Business Intelligence
How to connect Snowflake to a reactive notebook in under 10 minutes
Step-by-step guide to connect Snowflake to a reactive notebook, secure credentials, test the live connection, and run reactive queries.
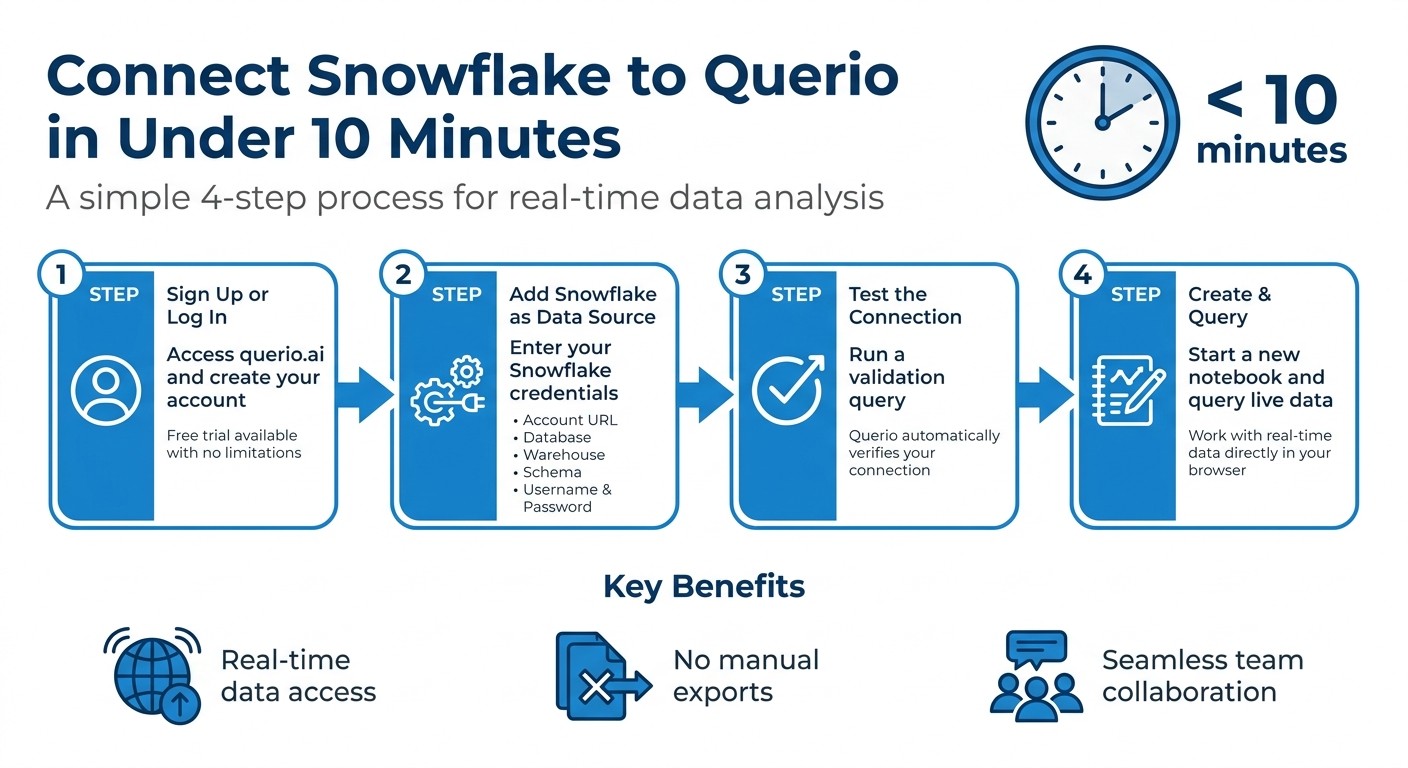
Connecting Snowflake to a reactive notebook like Querio is a fast way to streamline data analysis with modern business intelligence tools. This setup allows you to query live data, update analyses instantly, and collaborate seamlessly - all without manual exports or delays. Here's how to get started:
What you'll need: Snowflake credentials (account URL, warehouse, database, schema, username, password) and a Querio account.
Steps:
Sign up or log in to Querio.
Add Snowflake as a data source using your credentials.
Test the connection with a sample query.
Create a notebook and start querying live data.
This process ensures you can work with real-time data directly in your browser, simplifying workflows and improving team collaboration.
How to Connect Snowflake to Querio in 4 Steps
Set Up Querio and Snowflake Connection
Sign Up or Log In to Querio
Head over to querio.ai and either sign up or log in. Querio acts as an analytics workspace where AI agents can work with your data to create notebooks, layouts, and reusable context [4]. There’s a free trial available with no limitations on usage or seats, making it easy to test out the Snowflake connection without any upfront costs.
Add Snowflake as a Data Source
After logging in, go to the data source settings in Querio. Here, you’ll start by connecting a data source, which will automatically kick off an explore session [4].
Using your Snowflake credentials, fill out the following details:
Connection Field | Description | Example |
|---|---|---|
Account URL | Identifies your Snowflake instance |
|
Database | The database that contains your data |
|
Warehouse | The compute resources for query execution |
|
Schema | The specific schema within the database |
|
Role | Defines the access scope |
|
If you’re unsure about your account identifier, you can find it in your Snowflake URL or by running this query in Snowsight:
SELECT CURRENT_ORGANIZATION_NAME() || '-' || CURRENT_ACCOUNT_NAME();
The result usually follows the format: orgname-accountname [8].
Once you’ve entered these details, securely input your credentials to finalize the connection.
Enter Your Credentials Securely
Input your Snowflake username and password into Querio’s secure credential form. These credentials are encrypted for safety [5]. For production use, it’s a good idea to create a dedicated service account in Snowflake instead of relying on personal credentials [6]. Assign this account a custom read-only role with the following permissions:
USAGEprivileges on the warehouse, database, and schema.SELECTpermissions on both current and future tables within the schema [6].
This setup minimizes the risk of accidental data changes and simplifies security audits.
Snowflake - Connecting Local Jupyter Notebook to Snowflake Account
Configure and Test Your Connection
After setting up secure credentials, Querio takes the next step by configuring a live connection to Snowflake. This enables real-time data access, meaning your notebook can query Snowflake's infrastructure directly, without needing to create extracts or copies. With this reactive notebook environment, queries are executed in real-time, ensuring you're always working with the latest data.
"The workloads run on the Snowflake infrastructure... you can run Spark workloads interactively from Jupyter Notebooks, VS Code, or any Python-based interface without needing to manage a Spark cluster." - Snowflake Documentation [1]
Querio handles session initialization automatically, establishing a secure connection that supports both SQL and Python queries. For production environments, it's recommended to use Programmatic Access Tokens (PATs) with defined expiration dates and role restrictions for added security [1][2].
Enable Snowpark and Live Data Access
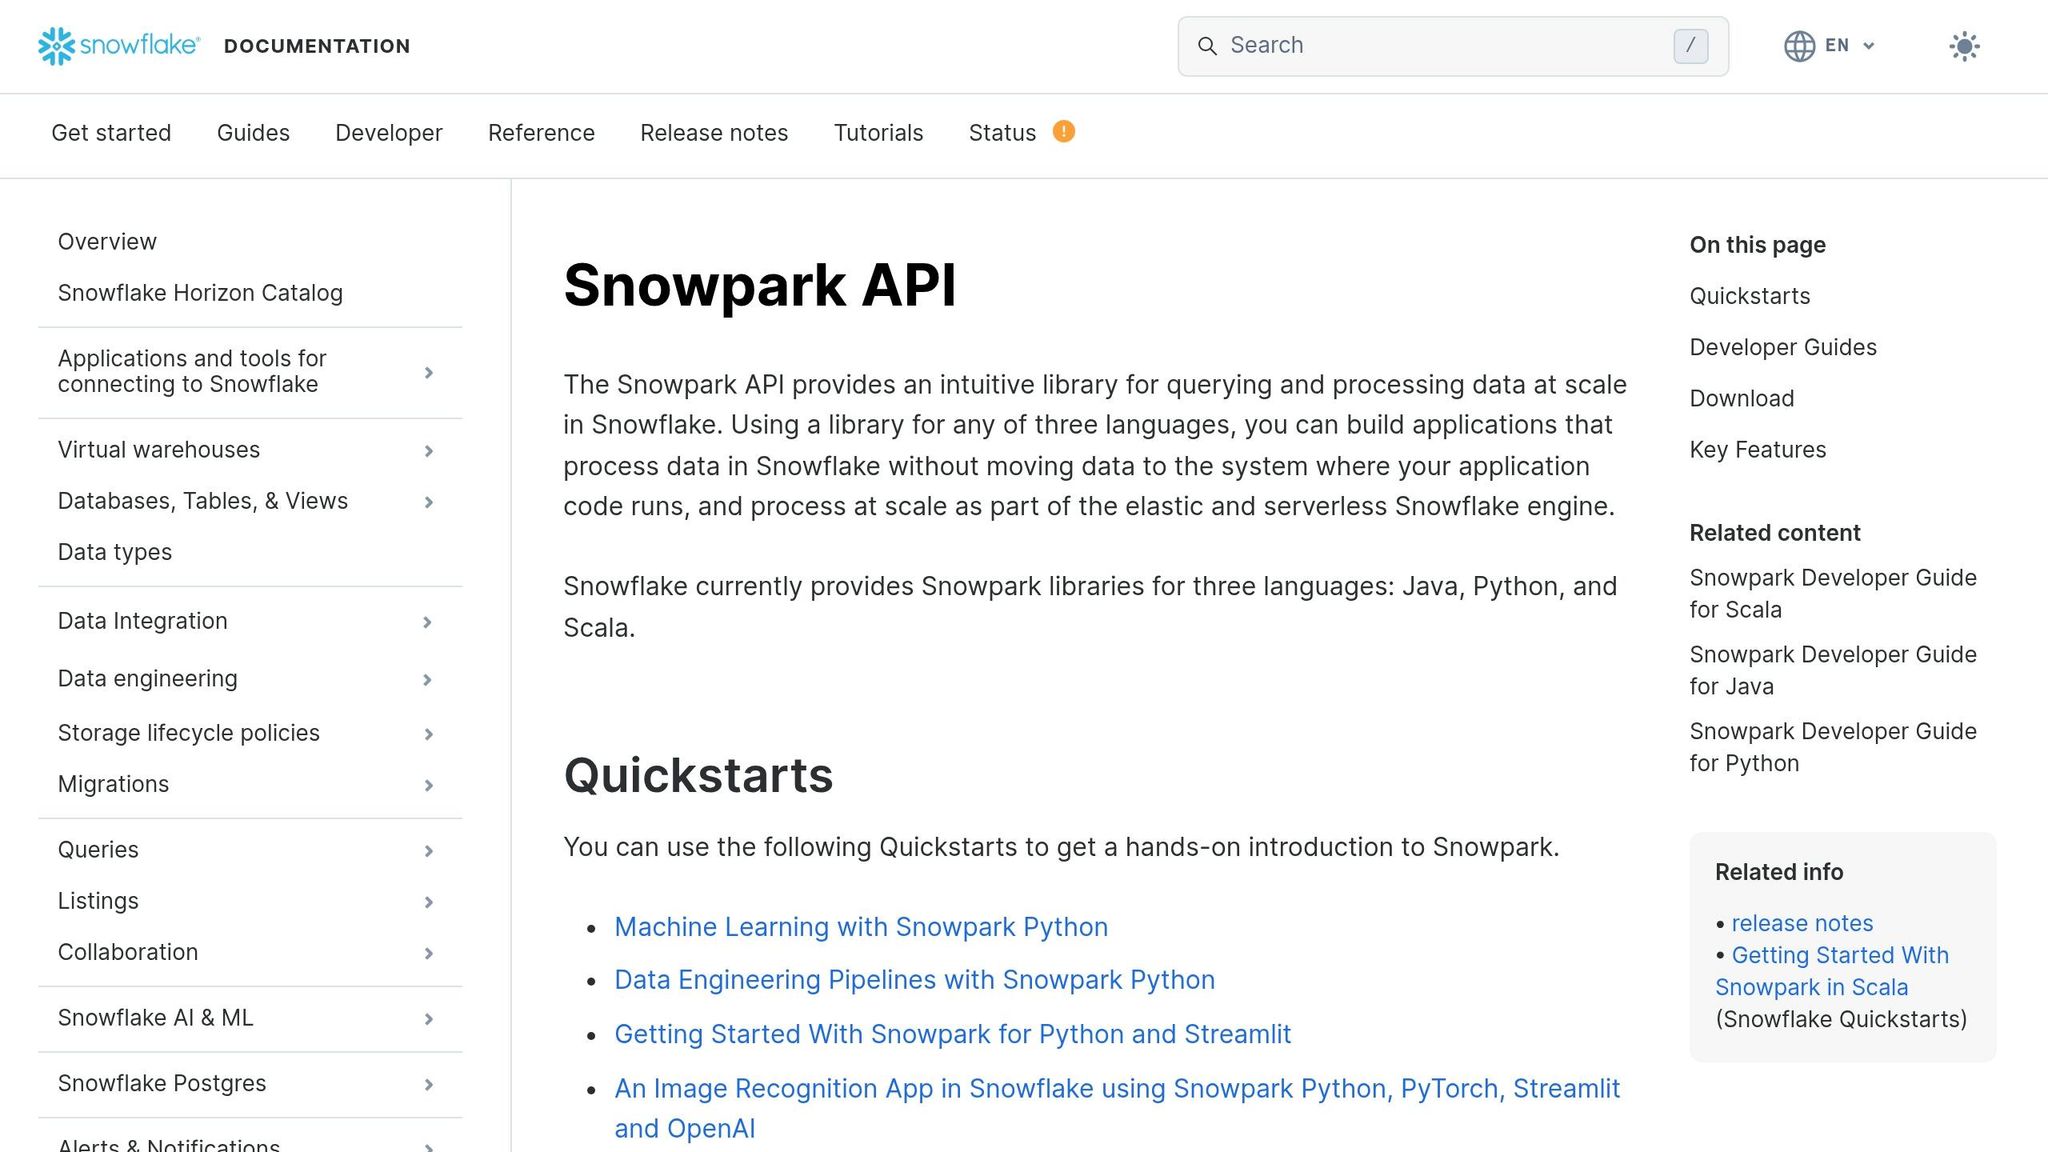
Querio’s reactive notebooks come pre-configured with Snowpark integration, allowing you to execute queries directly on your Snowflake warehouse without the need to manage external compute clusters [1][10]. It uses the warehouse, database, and schema settings configured earlier, so no additional setup is required.
For cloud-hosted notebook environments, ensure your Snowflake network policies permit connections from Querio's IP addresses. If you face access issues, check Snowflake’s network settings to confirm these permissions [3]. This setup builds on the earlier configuration, enabling seamless live data access without extra effort.
Run a Connection Test
To ensure everything is working, Querio automatically runs a validation query that checks your account identifier, credentials, and network settings [2][3]. If you prefer manual verification, open a new notebook and run a simple metadata query like SHOW SCHEMAS or SELECT CURRENT_DATABASE(). If the query executes successfully and returns results, your Snowflake connection is good to go [9][7].
Create and Run a Reactive Notebook
With your connection confirmed, it's time to dive into building a reactive notebook. In Querio, reactive notebooks are designed to automatically update whenever there's a change in data or logic [11][3]. Modify a query or tweak a filter, and every dependent cell refreshes instantly - no need for manual re-execution.
Start a New Notebook in Querio
Launch Querio and click on "New Notebook". You can choose from the following cell types based on your needs:
SQL cells for direct queries
Python cells for Snowpark operations
Natural language prompts to generate queries
The notebook seamlessly connects to your pre-configured Snowflake warehouse, database, and schema settings from earlier steps. This means no additional setup is required.
For initial testing, it's a good idea to use an X-Small warehouse to minimize credit usage [11]. To manage costs further, set the idle timeout to 15 minutes [11]. And don’t forget - you can manually end sessions once you’re done.
Run a Test Query on Snowflake Data
To ensure everything is functioning correctly, run a test query on Snowflake's SNOWFLAKE_SAMPLE_DATA database. This database includes datasets like TPCH, featuring customer and order records ranging from 15 million to 1.5 billion rows [12]. Use fully qualified table names to ensure consistency across environments:
"To ensure notebooks run consistently across environments and clients, use fully qualified names for tables and other objects." - Snowflake Documentation [13]
When you execute this query, the results will appear in an interactive datagrid. This datagrid allows you to scroll, filter, and sort the data [13]. Experiment with the query - adjust the LIMIT or add a WHERE clause - and observe how the notebook updates reactively.
For more complex tasks, consider using Snowpark Python dataframes. These are particularly efficient, removing duplicates up to 8x faster than Pandas by scaling with data volume [12].
If you encounter any issues while testing, check out the troubleshooting section that follows for guidance on resolving common connection problems.
Fix Common Connection Problems
Once your connection is set up, you might encounter a few hiccups. These typically fall into three categories: connection errors, permission issues, and performance bottlenecks. Tackling these ensures a seamless experience with Querio for real-time data analysis.
Connection and Credential Errors
Even with a proper setup, connection problems can pop up. One common mistake is including the full domain in your account name. Only use the account name (e.g., myorg-account1) without the domain, as adding the full URL will cause the connection to fail.
"Provided account is incorrect. - It contains full url... account should not include .snowflakecomputing.com" - Lukasz Szozda, Community Expert, Stack Overflow [16]
Make sure your firewall allows *.snowflake.com, *.snowflake.app, and *.snowflakecomputing.app, and confirm that WebSockets are enabled.
For key pair authentication, ensure your system clock is accurate. Snowflake will reject JWT tokens if they are received more than 60 seconds after issuance [14]. Additionally, double-check that your username matches the LOGIN_NAME property in Snowflake, as it may differ from the display name.
Session timeouts can also be an issue, often caused by a low STATEMENT_TIMEOUT_IN_SECONDS setting. By default, Snowflake notebook sessions are set to 30 minutes on Warehouse Runtime and 60 minutes on Container Runtime [15]. If your queries are timing out too quickly, adjusting these settings can help.
Permission-Related Problems
If Querio connects successfully but can't access your data, missing privileges are likely the culprit. Snowflake requires a specific hierarchy of grants: USAGE on the warehouse, database, and schema, and SELECT on the relevant tables or views [19][21].
To pinpoint missing permissions, use Snowflake's built-in diagnostic function:
This function will generate a detailed list of missing permissions for your query [17]. You can then grant the necessary permissions with commands like:
GRANT USAGE ON WAREHOUSE <warehouse_name> TO ROLE <role_name>;[18][20]GRANT SELECT ON ALL TABLES IN SCHEMA <db>.<schema> TO ROLE <role>;[18][20]
If you're using OAuth, remember that refresh tokens expire after 90 days of inactivity. Reauthorize the connection as needed [21].
For metadata access, grant IMPORTED PRIVILEGES on the SNOWFLAKE database. This allows Querio to view account usage and query history [18][20]. Keep in mind, if a role is dropped and recreated with the same name, Snowflake assigns it a new internal ID. This invalidates previous grants, so you'll need to reassign permissions to the "new" role [21].
Improve Query Performance
If your queries are running slowly, it might be due to transferring too much data into the notebook. For instance, using df.to_pandas() on large datasets can overwhelm memory and crash your session. Instead, use Snowpark to handle transformations directly within Snowflake's engine [22]. Perform operations like groupBy, count, and avg within Snowflake before pulling the results into your notebook [7].
To reduce data volume, apply server-side filtering early in your queries. Use SQL WHERE clauses or Snowpark filter() functions to limit the data retrieved [7]. Always reference tables with their fully qualified names (e.g., DATABASE.SCHEMA.TABLE_NAME) to ensure efficient object resolution [22].
You can also reuse query results by referencing earlier cells instead of re-running resource-intensive queries. Set your execution context explicitly with USE WAREHOUSE <name> and USE ROLE <name> to ensure queries are executed on the correct resources [22]. Use Snowflake's interface to monitor query execution and identify potential bottlenecks or warehouse queuing issues [7].
If you're using Python libraries that require caching - like Matplotlib or HuggingFace - set the environment variable to /tmp. This ensures compatibility, as the default user directory might be read-only.
Addressing these performance challenges will help streamline your workflow and prepare you for deeper data exploration.
Conclusion
Key Takeaways
Connecting Snowflake to a reactive notebook is a straightforward process. From signing up for Querio to running your first live query, it only takes a few minutes. The steps are simple: add Snowflake as a data source, securely input your credentials, and test the connection. Once that's done, you're ready to create a notebook and query live data from your warehouse.
Querio simplifies everything by eliminating the need for manual library setups, configuration files, or repetitive code. It offers direct, read-only access to your Snowflake data while translating plain English queries into efficient SQL. Plus, you can inspect every result to see the exact SQL generated, ensuring transparency and accuracy.
The shared context layer is another standout feature. It keeps business definitions consistent - like what qualifies as an "active user" - across your team, ensuring everyone works with the same logic. This governance layer helps prevent conflicting results and maintains data accuracy as your analytics grow.
With this setup, you can easily enhance your team's analytics workflows.
Next Steps
Now that your connection is ready, it's time to unlock Querio's full analytics potential. Start by defining your key metrics and KPIs in the context layer. This ensures all future queries adhere to consistent business logic, which is especially helpful for non-technical team members who need reliable insights without writing SQL.
You can also create interactive dashboards, automate reporting, and take advantage of Git integration to maintain a centralized source of truth. For more advanced needs, use Snowpark Python to process large datasets directly within Snowflake's compute engine, avoiding the hassle of moving data to local environments. If your team is working on machine learning, the Snowflake ML Registry lets you manage models as schema-level objects, making them easy to discover and reuse across your organization.
FAQs
Should I use a Snowflake service account or my own login?
When connecting Snowflake to a reactive notebook like Jupyter or Observable, it's usually best to use your own login credentials. This approach provides secure, personalized access and maintains proper access control. While service accounts can be used, they are typically not the go-to choice for interactive data exploration unless specific organizational policies or configurations call for them.
What Snowflake grants does Querio need to query my tables?
To allow Querio to access your tables in Snowflake, you'll need to set up specific grants. Start by creating a service user (for example, QUERIO_SVC) and assigning it a role (like QUERIO_ROLE). Once that's done, grant the following permissions to the role:
Usage on the warehouse, database, and schema
Select privileges on the tables
Make sure these configurations are handled by a Snowflake admin role, such as SECURITYADMIN, to ensure everything is set up correctly for access.
How do I fix Snowflake connection failures caused by network policies?
To fix Snowflake connection issues caused by network policies, make sure your network settings allow communication with the required domains: *.snowflake.app, *.snowflake.com, and *.snowflakecomputing.app. Additionally, check that WebSockets are not being blocked. It's important to verify that your external access integrations and network rules are properly set up by your administrator. If necessary, update your egress traffic rules to enable access to these key endpoints. Double-check these configurations to get your connection back on track.
Related Blog Posts


